- 您现在的位置:买卖IC网 > Datasheet目录320 > DEMOACKIT (Freescale Semiconductor)KIT DEMO KIT FOR DC9S08A Datasheet资料下载
参数资料
| 型号: | DEMOACKIT |
| 厂商: | Freescale Semiconductor |
| 文件页数: | 2/2页 |
| 文件大小: | 0K |
| 描述: | KIT DEMO KIT FOR DC9S08A |
| 标准包装: | 1 |
| 系列: | Flexis™ |
| 类型: | MCU |
| 适用于相关产品: | MC9S08AC128,MCF51AC256 |
| 所含物品: | 板,2 子卡,线缆 |
| 产品目录页面: | 730 (CN2011-ZH PDF) |
| 配用: | DEMOACEX-ND - BOARD EXPANSION FOR DEMO KIT |
| 相关产品: | MC9S08AC128CLKE-ND - MCU 128K FLASH 8K RAM 80-LQFP MC9S08AC128CFUE-ND - MCU 128K FLASH 8K RAM 64-QFP MC9S08AC128CFGE-ND - MCU 128K FLASH 8K RAM 44-LQFP |
�� �
�
�DEMOACKIT—Lab� Tutorial�
�DEMOACKIT�
�LAB�
�1�
�DEMOAC� Labs�
�These� labs� will� show� you� how� to�
�get� the� most� out� of� your� DEMOAC�
�board� toolkit.� The� DEMOAC�
�board� comes� in� several� versions�
�depending� on� the� target� AC� family�
�MCU:�
�? � DEMOS08AC16KIT�
�? � DEMOS08AC60KIT�
�? � DEMOS08AC128KIT�
�? � DEMO51AC256KIT�
�? � DEMOACKIT which includes both the �
�MC9S08AC128� and� MCF51AC256�
�This� lab� document� applies� to�
�DEMOACKIT.�
�Start� each� lab� with� the� board� powered�
�ON.� Make� sure� to� use� only� one� utility� at� a�
�time,� as� they� share� the� same� USB� source.�
�Familiarize� yourself� with� these� buttons:�
�Start/Continue� (F5)� button�
�MCU� Change� Wizard� button�
�Debug� button�
�Learn� How� to� Use� the� DEMOAC�
�Board� Toolkit� Utilities�
�This� lab� will� show� you� how� to� use� one� of� several�
�graphical� utilities� in� the� DEMOAC� Board� Toolkit�
�included� with� your� board.� Instructions� to� download�
�these� utilities� to� your� computer� are� provided� in� Step� 2�
�of� the� Quick� Start� Guide� (DEMOACQSG.pdf).�
�We� will� use� the� CodeWarrior� IDE� to� program� a�
�new� software� example� into� the� AC256� and� use� the�
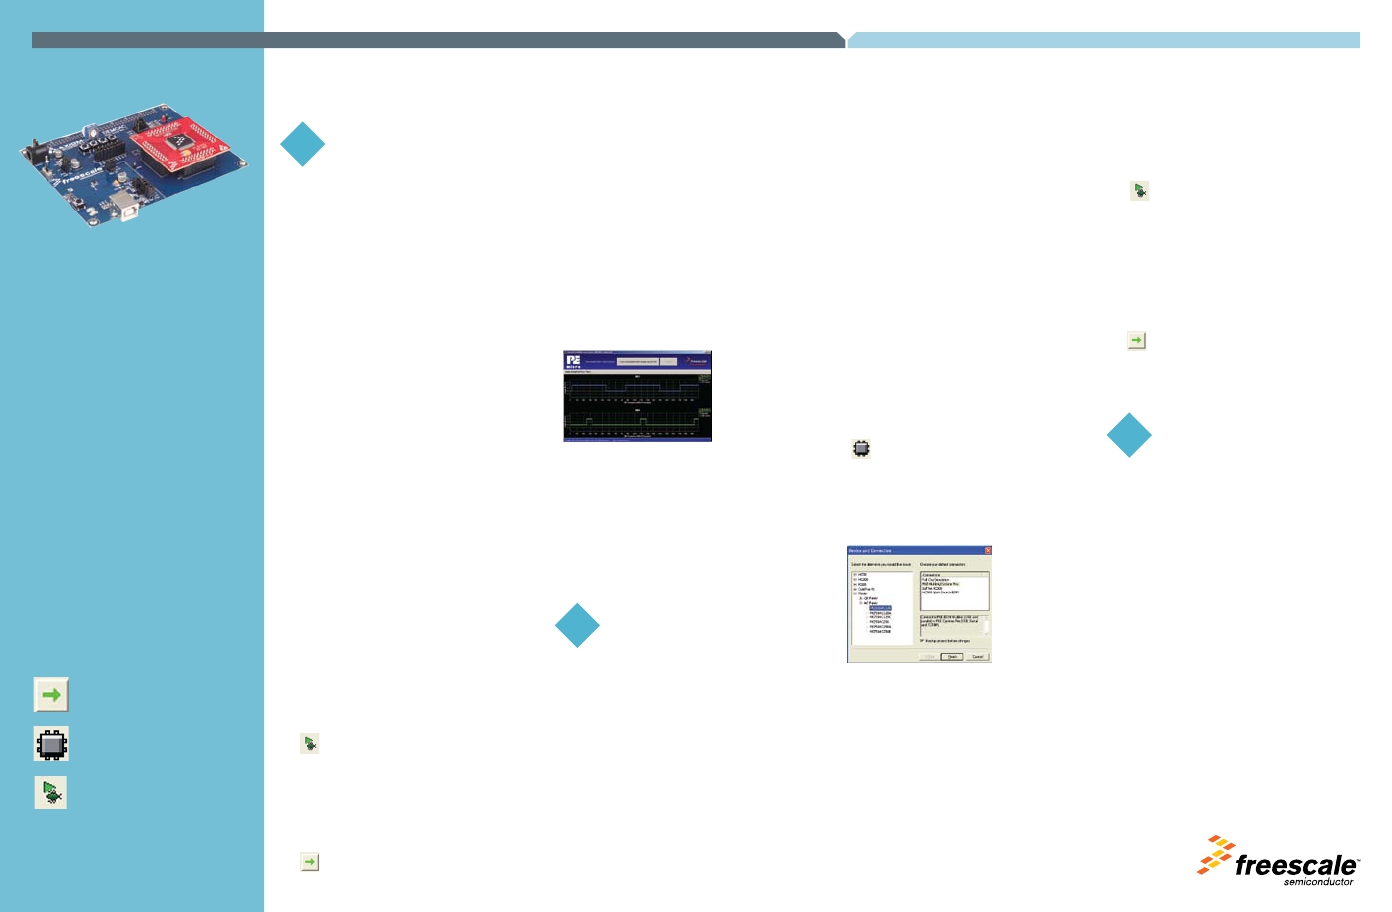
�DEMOAC� Logic� Analyzer� utility.� This� PC-based� utility�
�graphs� the� IN0� and� IN1� signals� on� the� board.� For�
�convenience,� if� both� DATA1� and� DATA2� jumpers� are�
�installed,� IN0� graphs� PTF2� activity� and� IN1� graphs�
�PTF3� activity.� To� graph� other� microcontroller� signals,�
�use� wire� jumpers� from� the� USB� side� of� DATA1� and�
�DATA2� to� the� respective� signals� on� the� board’s� MCU�
�PORT.�
�1.� Open� CodeWarrior� for� Microcontrollers.� From�
�Windows� start� menu� you� can� locate� it� using�
�the� “Programs>Freescale� CodeWarrior>CW� for�
�Microcontroller� V6.1>CodeWarrior� IDE.exe”� path.�
�2.� Click� on� “Load� Example� Project”� from� CodeWarrior�
�startup� dialog.� If� the� startup� dialog� is� not� shown,� it� may�
�be� opened� from� the� CodeWarrior� menu� by� clicking� “File”�
�and� then� “Startup� Dialog…”.�
�3.� From� example� projects� menu,� open� tree�
�to� select� “ColdFire� V1>Evaluation� Board�
�Examples>DEMOAC>DEMO51AC256_Logic_Analyzer”�
�4.� Create� a� new� project� name� (ex.� Lab1),� set� desired�
�location� and� click� “Create� Project”.� This� will� open� the�
�project� for� the� logic� analyzer� application� for� the� 32-bit�
�microcontroller.�
�5.� Ensure� the� 80-Pin� LQFP� 32-bit� ColdFire� ?� V1� AC256�
�microcontroller� daughter� card� is� installed� on� the� DEMOAC�
�board.�
�6.� Turn� board� power� switch� to� ON.�
�7.� Compile� and� program� the� logic� analyzer�
�application� by� clicking� on� “Debug”� button.�
�8.� From� Connection� Manager� menu,� select�
�“USB1:DEMOAC(PEnnnnnnn)”� port� and� click� on�
�“Connect� (Reset).”�
�9.� From� Loader� menu,� click� on� “OK”� to� allow� the� debugger� to�
�mass� erase� the� microcontroller’s� on-chip� flash� memory�
�and� program� it� with� the� new� application.�
�10.� Click� on� “Start/Continue� (F5)”� button� in� debugger�
�to� run� application.�
�11.� Open� the� DEMOAC� Board� Logic� Analyzer� utility� from�
�Windows� start� menu:� Programs>P&E� Embedded�
�Multilink� Toolkit>Utilities>Logic� Analyzer� Utility.�
�12.� In� the� utility,� click� on� the� “Connect� to� Embedded� Multilink�
�Analyzer� and� Graph� Pins”� button� to� begin� graphing� IN0�
�and� IN1.� These� signals� will� be� continually� graphed� at� a�
�sampling� rate� of� 10Khz.�
�13.� Rotate� the� potentiometer� RV1� clockwise� and� counter-�
�clockwise.� This� will� change� the� duty� cycle� of� the� variable�
�pulse-width� modulation� signals� output� on� the� PTF2� and�
�PTF3� pins.� The� PTF2� waveform� is� shown� on� analyzer�
�channel� IN0.�
�14.� Click� on� “Close� Port”� button� when� finished.�
�For� more� information� on� the� DEMOAC� Board� Toolkit�
�read� the� board� user� manual� (DEMOAC_UM.pdf)�
�on� www.freescale.com/flexis� or� on� the� DVD�
�under� Documentation� >� Development� System�
�Documentation� >� DEMOAC� User� Manual� of� the� DVD�
�menu.� For� new� and� upgraded� utilities� to� the� DEMOAC�
�Board� Toolkit,� visit� http://www.pemicro.com/�
�LAB�
�2�
�Migrate� Quickly� from� 32-bit�
�to� 8-bit� Using� the� Quick� Start�
�Application�
�This� lab� will� show� you� how� to� quickly� migrate� any�
�application� using� the� Flexis?� AC� microcontrollers.�
�The� Flexis� brand� delivers� pin� to� pin� compatibility,�
�one� development� tool,� and� the� same� peripherals�
�between� 8-bit� and� 32-bit� devices.� It� demonstrates� an�
�downward� migration� from� 32-bit� to� 8-bit,� although�
�upward� migration� is� just� as� simple.� Continuing� with�
�the� Quick� Start� Application� that� is� pre-loaded� in�
�the� microcontroller’s� on-chip� flash� memory� you� will�
�now� use� the� CodeWarrior� ?� MCU� Change� Wizard� to�
�retarget� and� rebuild� your� project� from� the� 32-bit� AC256�
�microcontroller� to� the� 8-bit� AC128� microcontroller.�
�Setup� demo:�
�1.� Open� CodeWarrior� for� Microcontrollers.� From�
�Windows� start� menu� you� can� locate� it� using�
�the� “Programs>Freescale� CodeWarrior>CW� for�
�Microcontroller� V6.1>CodeWarrior� IDE.exe”� path.�
�2.� Click� on� “Load� Example� Project”� from� CodeWarrior�
�startup� dialog.� If� the� startup� dialog� is� not� shown,� it� may�
�be� opened� from� the� CodeWarrior� menu� by� clicking� “File”�
�and� then� “Startup� Dialog…”.�
�3.� From� example� projects� menu,� open� tree� to� select�
�“ColdFire� V1>Evaluation� Board� Examples>DEMOAC>�
�DEMO51AC256_Logic_Analyzer”�
�4.� Create� a� new� project� name� (ex.� Lab2),� set� desired�
�location� and� click� “Create� Project”.� This� will� open� the�
�project� for� the� logic� analyzer� application� for� the� 32-bit�
�microcontroller.�
�5.� Click� on� the� “MCU� Change� Wizard”� button� to�
�switch� project� to� 8-bit� microcontroller.�
�6.� From� Wizard,� change� microcontroller� selection� from�
�32-bit� “MCF51AC256”� to� 8-bit� “MC9S08AC128”� in� the�
�“Flexis>AC� Family”� tree� as� show� in� image� below.� Make�
�sure� ‘P&E� Multilink/Cyclone� Pro’� is� selected� as� the� default�
�connection.�
�7.� Click� “Finish.”� In� the� background,� CodeWarrior� will�
�transform� your� project� to� the� 8-bit� microcontroller� with�
�no� software� changes� needed.� A� “Project� Messages”�
�window� may� appear� letting� you� know� that� changes� have�
�been� made� to� the� project.�
�8.� Click� on� “Close� Port”� on� Logic� Analyzer� utility� if� open.�
�9.� Turn� board� power� switch� to� OFF.�
�10.� Replace� the� 80-Pin� LQFP� 32-bit� ColdFire?� V1� AC256�
�microcontroller� with� an� 80-Pin� LQFP� 8-bit� S08� AC128�
�microcontroller� in� the� daughter� card.�
�11.� Turn� board� power� switch� to� ON.�
�12.� Compile� and� program� the� 8-bit� AC128�
�microcontroller� with� transformed� logic� analyzer�
�application� by� clicking� on� “Debug”� button.�
�13.� From� Connection� Manager� menu,� select� “DEMOAC� on�
�USB1� (Name=Pennnnnnn)”� port� and� click� on� “Connect�
�(Reset).”�
�14.� From� Loader� Warning� menu,� click� on� “OK”� to� allow� the�
�debugger� to� mass� erase� the� microcontroller’s� on-chip�
�flash� memory� and� program� it� with� the� new� application.�
�15.� Click� on� “Start/Continue� (F5)”� button� in� debugger�
�to� run� application.�
�16.� Repeat� Quick� Start� Guide� Step� 4� instructions� to� observe�
�the� 8-bit� AC128� device� run� the� same� application� as� the�
�32-bit� AC256� device.�
�LAB�
�3�
�Measure� Performance�
�Improvement� Between� 8-bit� and�
�32-bit� with� the� Accelerometer�
�Application�
�This� lab� will� highlight� the� performance� differences�
�between� the� 8-bit� and� 32-bit� AC� microcontrollers� and�
�show� how� these� microcontrollers� can� easily� interface�
�with� a� sensor.� This� lab� will� also� detail� how� to� use�
�another� one� of� several� software� utilities� included�
�with� your� board� to� help� you� in� your� development.�
�Instructions� to� download� these� utilities� to� your�
�computer� were� provided� in� Step� 2� of� the� Quick�
�Start� Guide.�
�The� Accelerometer� Application� reads� the� X,� Y,� and�
�Z� axes� of� the� 3-axis� accelerometer� on� the� DEMOAC�
�board� using� the� microcontroller’s� A/D� converter.� It�
�outputs� a� processed� version� of� the� accelerometer� data�
�on� the� microcontroller’s� serial� communication� interface.�
�This� processed� data� is� a� rolling� average� of� the� raw�
�accelerometer� data,or� a� filtered� version� of� the� raw�
�accelerometer� data,� depending� on� the� selected� mode.�
�相关PDF资料 |
PDF描述 |
|---|---|
| DEMOEM | BOARD DEMO HARDWARE ONLY |
| DEMOQE128 | DEMO BOARD FOR QE128 FLEXIS |
| DFN2.86BK | DURA-FLEX 2.86" BLACK 100' |
| DG-ACC-JADP-1 | JTAG ADAPTER FOR CC 9C W-9C |
| DG-ACC-JBST | JTAG-BOOSTER FOR NETSILICON 3.3V |
相关代理商/技术参数 |
参数描述 |
|---|---|
| DEMO-ACPF-7001 | 制造商:未知厂家 制造商全称:未知厂家 功能描述:Demo board for ACPF-7001 |
| DEMO-AD5700D2Z | 功能描述:界面开发工具 RoHS:否 制造商:Bourns 产品:Evaluation Boards 类型:RS-485 工具用于评估:ADM3485E 接口类型:RS-485 工作电源电压:3.3 V |
| DEMOAPEXSENSOR | 功能描述:加速传感器开发工具 DEMOAPEXSENSOR RoHS:否 制造商:Murata 工具用于评估:SCA3100-D04 加速:2 g 传感轴:Triple Axis 接口类型:SPI 工作电压:3.3 V |
| DEMO-AT3/4-XX32 | 制造商:未知厂家 制造商全称:未知厂家 功能描述:AT-32032 and AT-41532 demonstration for 800-900 MHz applications |
| DEMO-AT32063 | 制造商:未知厂家 制造商全称:未知厂家 功能描述:860 MHz cascode amplifier |
发布紧急采购,3分钟左右您将得到回复。