- 您现在的位置:买卖IC网 > PDF目录190061 > PIC16C711 PIC16C71 to PIC16C710/711 Migration PDF资料下载
参数资料
| 型号: | PIC16C711 |
| 英文描述: | PIC16C71 to PIC16C710/711 Migration |
| 中文描述: | PIC16C71的PIC16C710/711迁移 |
| 文件页数: | 64/67页 |
| 文件大小: | 2723K |
| 代理商: | PIC16C711 |
第1页第2页第3页第4页第5页第6页第7页第8页第9页第10页第11页第12页第13页第14页第15页第16页第17页第18页第19页第20页第21页第22页第23页第24页第25页第26页第27页第28页第29页第30页第31页第32页第33页第34页第35页第36页第37页第38页第39页第40页第41页第42页第43页第44页第45页第46页第47页第48页第49页第50页第51页第52页第53页第54页第55页第56页第57页第58页第59页第60页第61页第62页第63页当前第64页第65页第66页第67页
Rev. 2.0, 03/06/02, 58
3.10
Generating a Makefile
The HEW allows you to generate a makefile, which can be used to build parts of your workspace without HEW.
This is particularly useful of you want to send a project to a user who does not have the HEW or if you want to
version control an entire build, including the make components.
To generate a makefile:
1. Ensure that the project, which you want to generate a makefile for, is the current project.
2. Ensure that the build configuration that you want to build the project with is the current configuration.
3.
Select [Build>Generate Makefile].
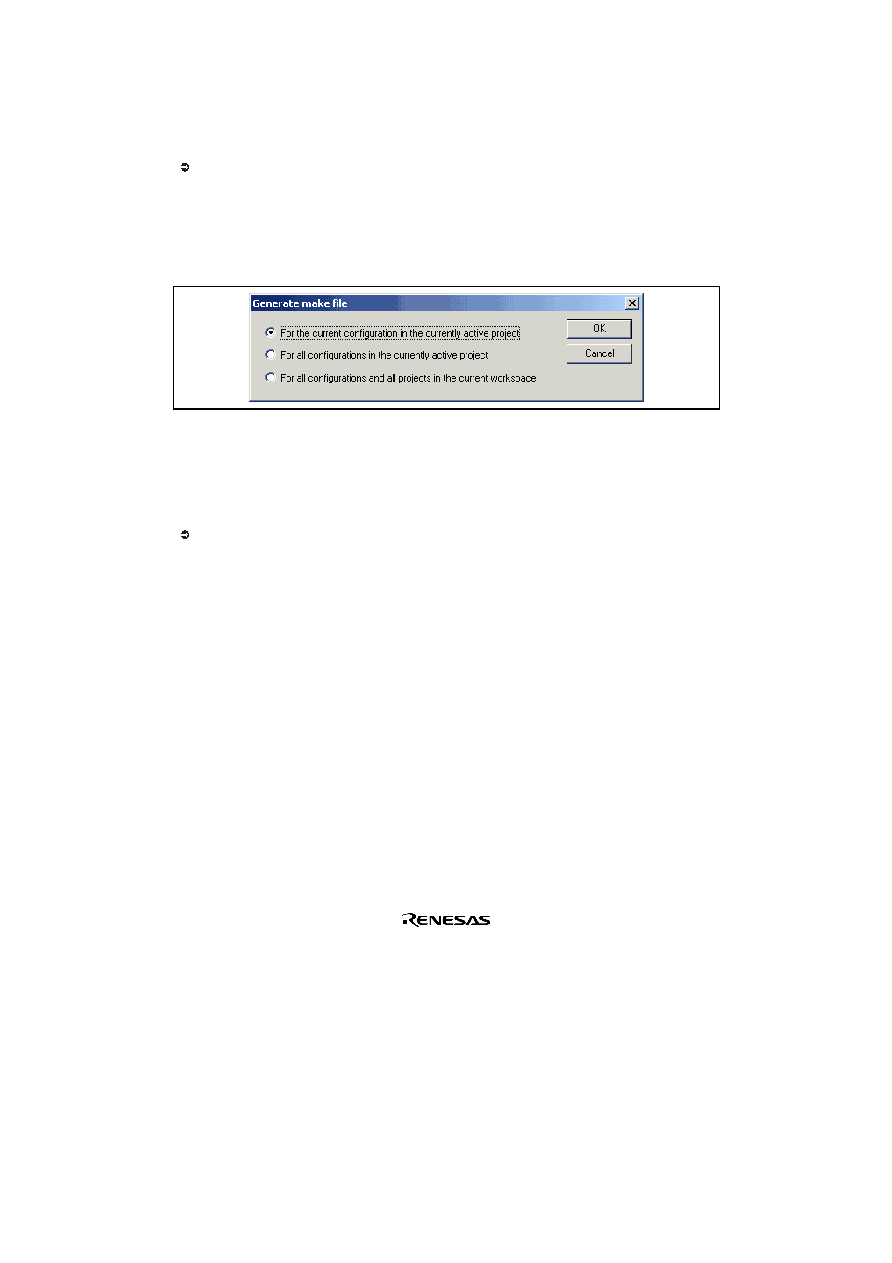
4.
Once this menu has been selected a dialog is displayed which asks the user what parts of the workspace
need to be added to the make file. (See figure 3.23.)
5.
Select the radio button which is relevant for your make file and then click OK.
Figure 3.23: Generate makefile Dialog
The HEW will create a subdirectory “make” within the current workspace directory and then generate the
makefile into it. It is named after the selection, with a .mak extension for example the current project and
configuration(e.g. project_debug.mak). The executable HMAKE.EXE, located in the HEW installation directory,
is provided for you to execute the makefiles generated by the HEW. It is not intended to execute makefiles,
which have been user modified.
To execute a makefile:
1. Open a command window and change to the “make” directory where the makefile was generated.
2. Execute HMAKE. Its command line is HMAKE.EXE <makefile>.
Note:
The degree portability of a generated makefile is entirely dependent upon how portable the project itself
is. For example, any compiler options, which include full paths to an output directory or include file
directory, will mean that, when given to another user with a different installation, the build will probably
fail. In general use placeholders wherever possible – using a full, specific path should be avoided when
possible.
相关PDF资料 |
PDF描述 |
|---|---|
| PIC16C710 | PIC16C71 to PIC16C710/711 Migration |
| PIC16C6X7 | |
| PIC16C68 | 8-Bit CMOS Microcontrollers(3.45 M) |
| PIC16C66 | PIC16C66 Rev A Silicon Errata |
| PIC16C64-20P | IC-8-BIT CMOS MCU-OTP |
相关代理商/技术参数 |
参数描述 |
|---|---|
| PIC16C711/JW | 功能描述:8位微控制器 -MCU 1.75KB 68 RAM 13 I/O RoHS:否 制造商:Silicon Labs 核心:8051 处理器系列:C8051F39x 数据总线宽度:8 bit 最大时钟频率:50 MHz 程序存储器大小:16 KB 数据 RAM 大小:1 KB 片上 ADC:Yes 工作电源电压:1.8 V to 3.6 V 工作温度范围:- 40 C to + 105 C 封装 / 箱体:QFN-20 安装风格:SMD/SMT |
| PIC16C711-04/P | 功能描述:8位微控制器 -MCU 1.75KB 68 RAM 13 I/O 4MHz PDIP18 RoHS:否 制造商:Silicon Labs 核心:8051 处理器系列:C8051F39x 数据总线宽度:8 bit 最大时钟频率:50 MHz 程序存储器大小:16 KB 数据 RAM 大小:1 KB 片上 ADC:Yes 工作电源电压:1.8 V to 3.6 V 工作温度范围:- 40 C to + 105 C 封装 / 箱体:QFN-20 安装风格:SMD/SMT |
| PIC16C711-04/P | 制造商:Microchip Technology Inc 功能描述:IC 8BIT CMOS MCU 16C711 DIP18 |
| PIC16C711-04/SO | 功能描述:8位微控制器 -MCU 1.75KB 68 RAM 13 I/O 4MHz SOIC18 RoHS:否 制造商:Silicon Labs 核心:8051 处理器系列:C8051F39x 数据总线宽度:8 bit 最大时钟频率:50 MHz 程序存储器大小:16 KB 数据 RAM 大小:1 KB 片上 ADC:Yes 工作电源电压:1.8 V to 3.6 V 工作温度范围:- 40 C to + 105 C 封装 / 箱体:QFN-20 安装风格:SMD/SMT |
| PIC16C711-04/SO | 制造商:Microchip Technology Inc 功能描述:8BIT CMOS MCU SMD 16C711 SOIC18 |
发布紧急采购,3分钟左右您将得到回复。